
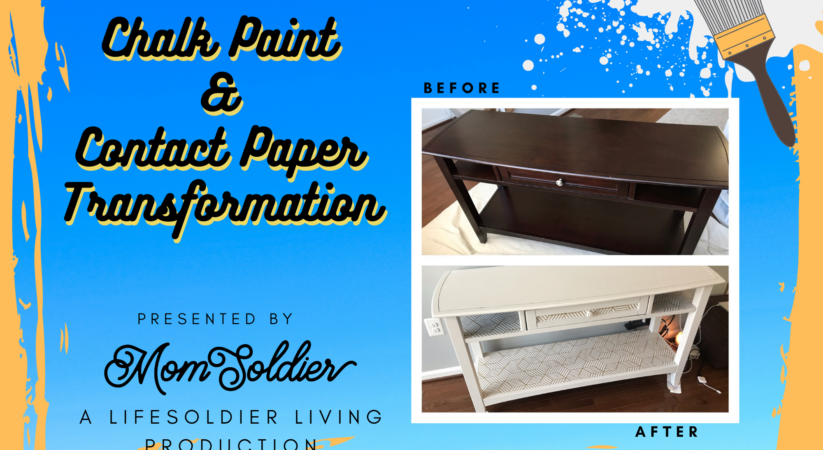
Do you have dark, dated furniture that you would rather drag to the curb than look at in your living room every day? Are you looking for a way to combine modern and shabby chic decor? I have a solution…and it doesn’t even involve any heavy lifting! What’s even better? It won’t cost you an arm and leg, or a gigantic amount of time. We all know that our time is precious and a project that takes days and days isn’t going to cut it. Even the busiest of people can tackle this task. I’m thankful to be able to spend my days at home and that I have time to use chalk paint in-between homeschool lessons and blog writing!
If you want to know more about finding the precious time to do things for fun, then click here!
Find the right piece of furniture…
Most people have an opinion on what the furniture in their house should look like, and that is how I know you can find the perfect piece of furniture to transform into something you love. It can be from anywhere…a thrift store, IKEA, Walmart, flea market…even your own home! Focus on the shape and overall look more than the finish. Find something that fits a specific space and don’t worry about it’s color or whether is has imperfections.
Find the right chalk paint…
There are many brands of chalk paint out there, so this part is up to you. I will tell you what I like to use, and if you feel so inclined, maybe you’ll choose it, too! Bungalow 47 has been my go-to for chalk paint. I love the color choices, price point and the fact that it operates like a small business. The paint ships quickly and the website is simple to use. I’m not even an affiliate of Bungalow 47 and I’m still pushing their product. In my opinion, it’s that great!
Gather the necessary supplies…
You don’t need much before you begin painting with chalk paint. Here’s what you need:
- Bungalow 47 paint (obviously)
- the piece of furniture
- accent/contact paper (if you are going this route)
- sandpaper (if you plan to do any distressing)
- a drop cloth of some sort to protect your floor
- a lint-free cloth for dusting
- the right paint brush
You don’t even need to move the furniture piece too far from where it will be placed when it’s done. Chalk paint doesn’t give off the normal painting fumes that you may have experienced the last time you painted your bedroom, and as long as you’re careful with the brush, it won’t even splatter. Chalk paint brushes are thicker than a run-of-the-mill paint brush, which helps prevent splattering and also allows you to apply more paint in a shorter amount of time. So, gather your supplies and get to it!
Prepare the Surface and Paint!
Before you dip your paint brush in the can, use a lint-free cloth to wipe away any dust from your chosen piece of furniture. If needed, use a damp cloth to wipe away any dirt or debris. No sanding required! Now, as long as you have your floor protected, you can get to work and paint, paint, paint! Chalk paint tends to dry quickly, so you should work at a fast pace to cover every surface. The first coat of paint doesn’t have to look pretty…it’ll look better after coat #2!
Click here to see the chalk painting process in action!
You’re well on your way to the modern, shabby chic/farmhouse look that you’re after!
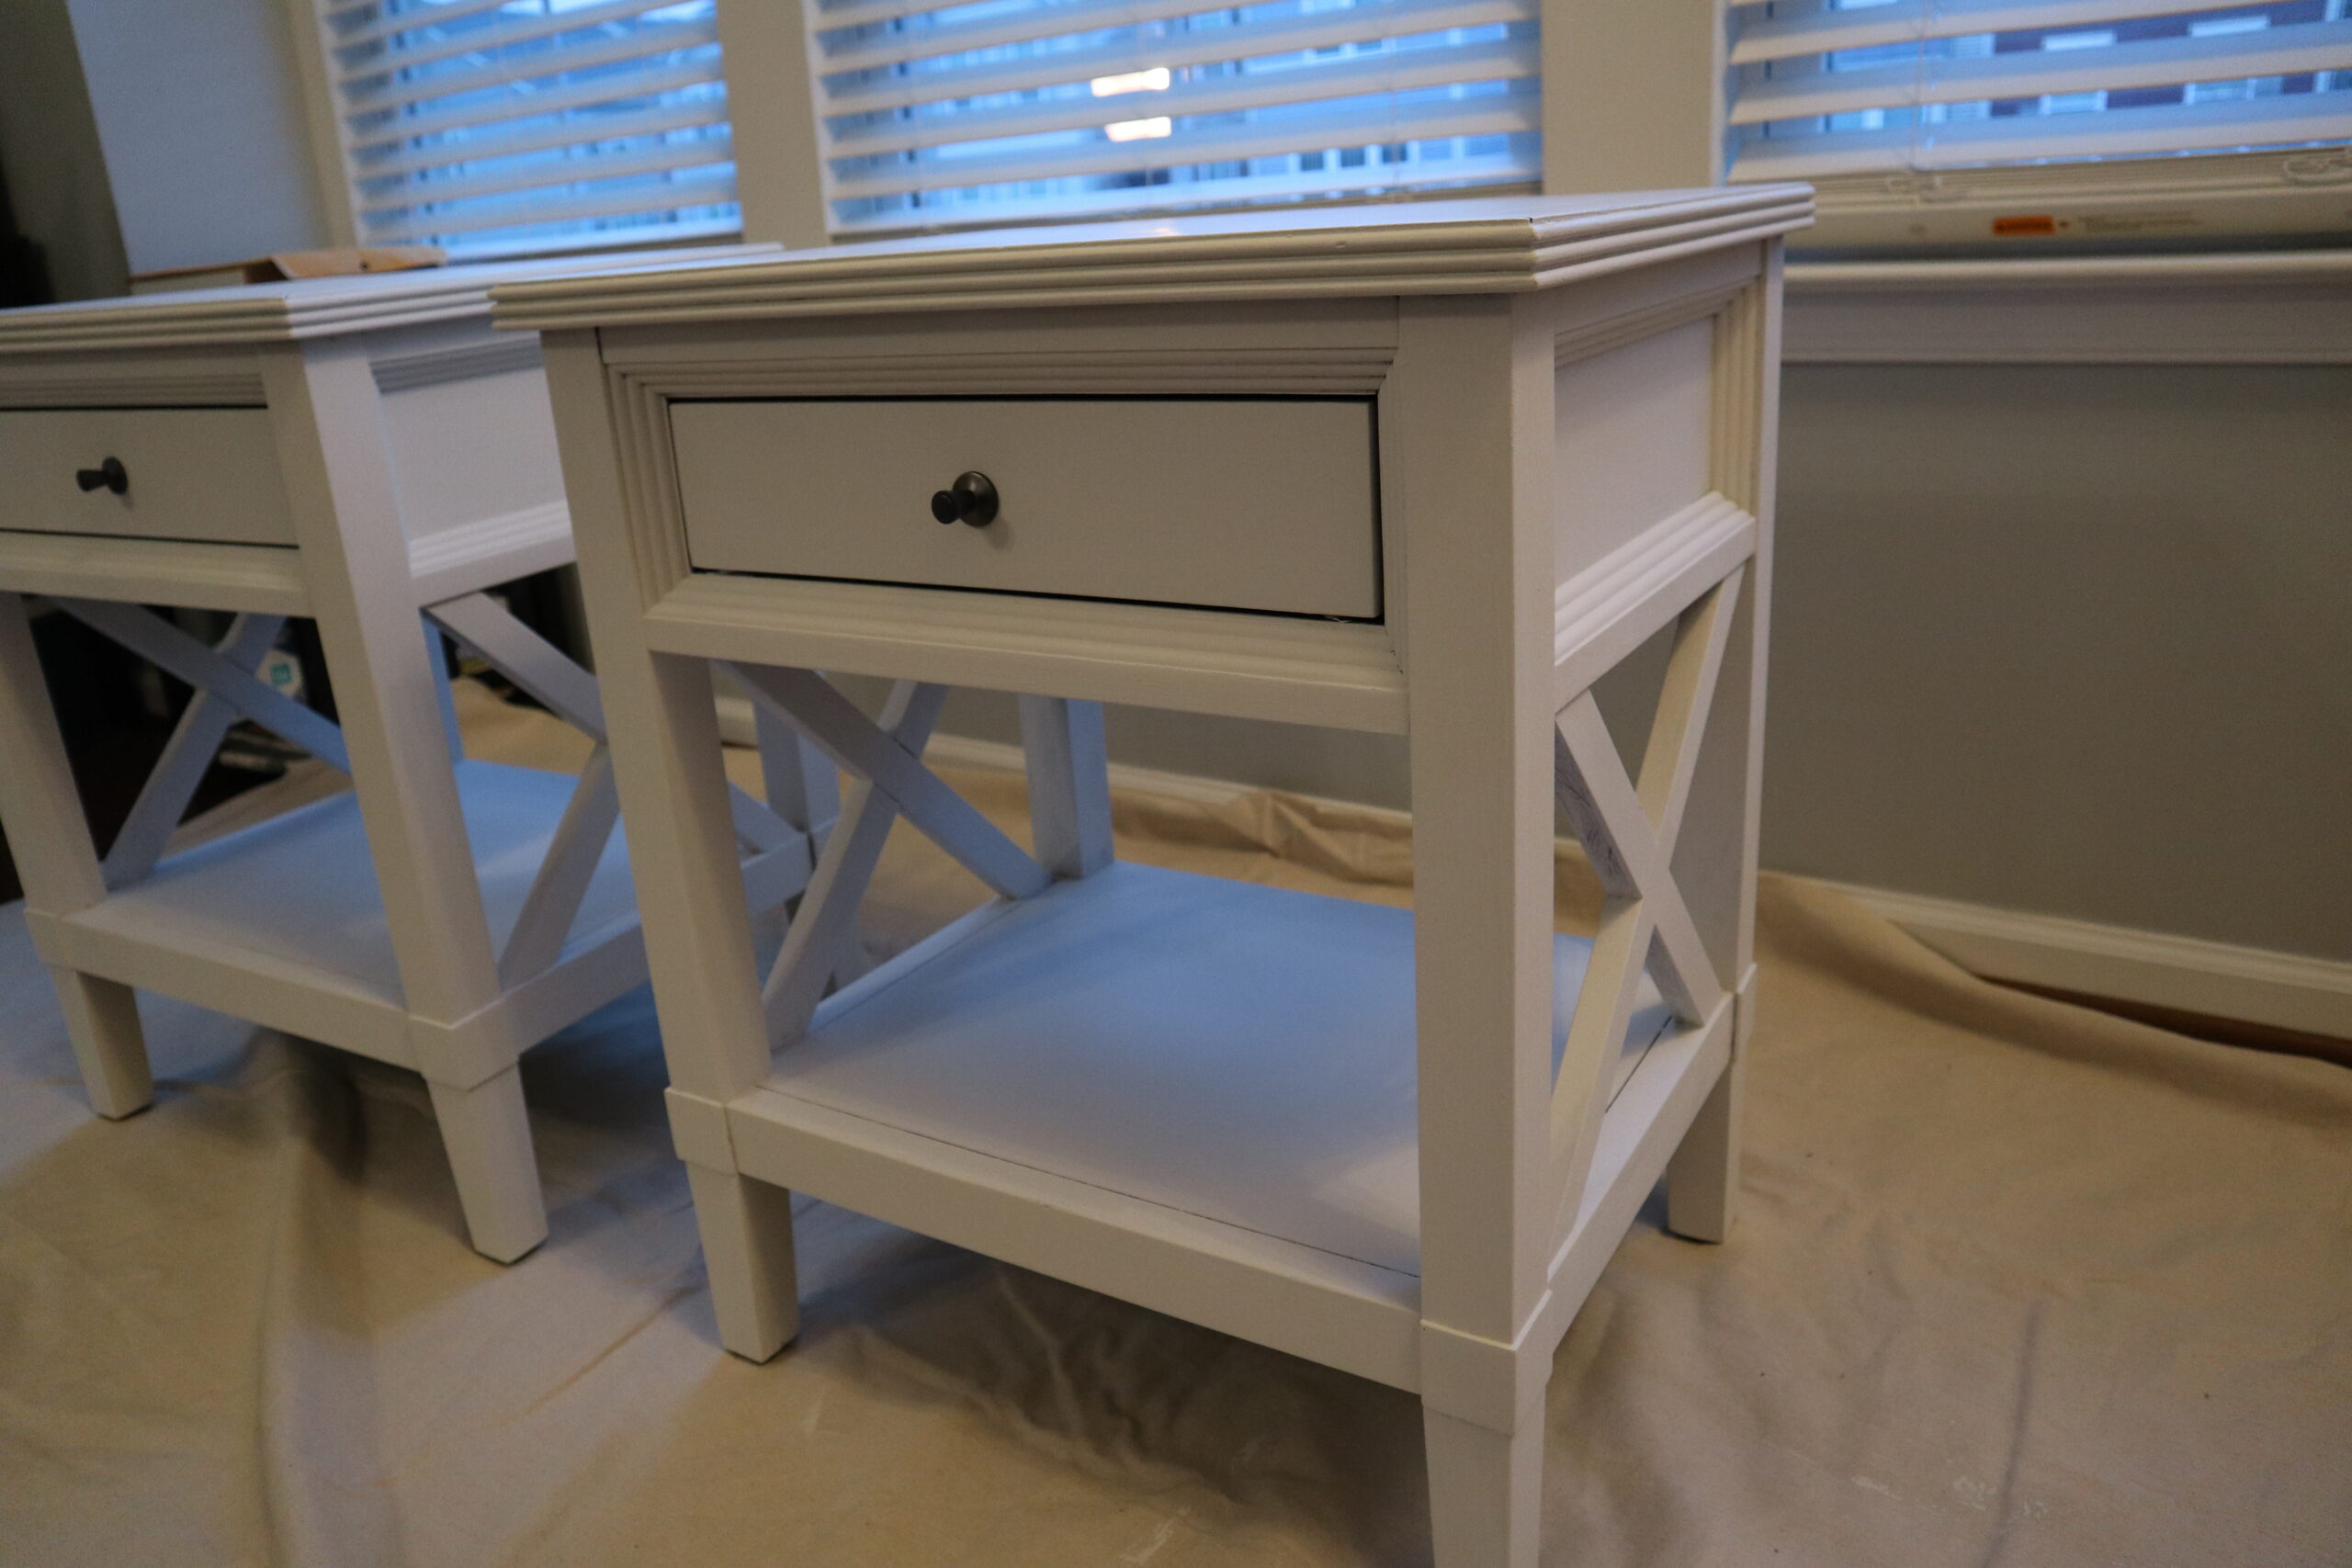
Depending on what your piece of furniture is made of and what color it is, you could need 2-4 coats of paint. Don’t worry, though, it only takes about two hours in-between coats for the paint to dry. As long as it’s not clammy or cool to the touch, it’s dry enough for another coat! This also depends on the thickness of each coat…the thicker the coat, the longer it will take to try. I find that thin coats work best and allow for an even application all over.
Paint brushes come in all shapes and sizes…
So, as you know, some pieces of furniture have nooks and crannies that can be tough for big, thick brushes to reach. The cool thing about chalk paint is that you can dab the brush (read: forcefully jab it repeatedly until the paint gets in there…trust me, it works) and then smooth it over for a finished look. Speaking of giving your pieces finished looks, there are a couple more things you can do. The first is use a clear coat, using the same brush (cleaned, and dried, of course!) and this can also be purchased from Bungalow 47. Again, there are others out there, but this is my favorite! Pieces of furniture that will have high traffic use, like coffee tables or kitchen tables, need to have a layer to protect from water and other spills. A clear coat is more of a personal preference when it comes to other pieces in your home. For example, I painted an accent table and some beside tables and did not use a clear coat because we don’t use them for anything other than picture frames, storage containers and lamps. I did use a clear coat on our dining table, for obvious reasons.
Add some modern flare to your already shabby and chic look…
One of the reasons I paint my furniture is because I love the shabby chic and farmhouse look of white, (or other colors) and sometimes distressed, wooden pieces. Something else that can make your piece stand out is using contact paper…yes, you heard me correctly…contact paper. The same stuff that you used to make your leaf collection in high school (not clear this time, though) and the very same stuff your grandmother used to line the inside of dresser drawers and cabinet shelves. The difference? This contact paper is made to be seen! It’s made to add a statement to an otherwise plain and muted piece of furniture. If you want to see how to add contact paper to your painted piece, you can watch my YouTube video, here.
Shabby Chic and Farmhouse Decor
If you are more interested in a distressed look on your painted furniture, you can easily use sandpaper to go over the edges and random spots on main surfaces to rub away thin layers of paint. I recommend practicing on the back or a less noticeable surface to be sure you like the way it looks. Chances are, you won’t have to rub with too much pressure, so just do a little at a time. For edges, if you want that distressed, farmhouse look, run the sandpaper along the edge until you can see the original finish come through. This is a personal preference, and there’s not really a clear answer on how much you should distress. If you want to get even more fancy, you can add a wax layer to give your piece a bit of shine, and also protect it a little more. I actually haven’t ventured into the waxing portion of the process, but when I find the right piece, I will give it a try!
Bring the Modern, Shabby Chic Farmhouse Decor to your home today!

You can easily and inexpensively transform furniture into whatever your heart desires. Chalk paint is versatile…it can “stick” to just about any surface. I’ve even seen someone paint an upholstered chair before! My mind was blown! There is minimal preparation and you can have a finished piece in a day or less. Do you want to finally get rid of those eye-sore pieces you have sitting in your living room? What are you waiting for?